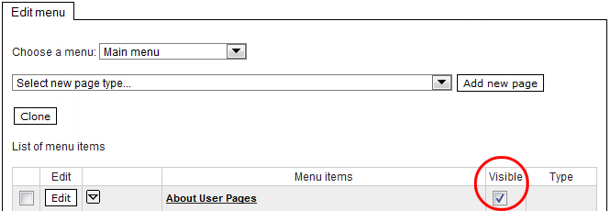
Adding a New Menu Item (Subpage)
- On the menu editing page, open the SELECT MENU ITEM TYPE dropdown list and select the type of menu item you wish to add.

01 – SIMPLE CONTENT PAGE
A simple page intended for the entry of text and a smaller number of images.
02 – CATALOGUE OF PRODUCTS AND SERVICES
A page for a structured display of products with a preset space for the photograph and description of individual products.
03 – GALLERY A page for a structured display of a greater number of images with simplified server upload. The application automatically adjusts the uploaded images for unified display according to the settings.
04 - WEB FORM
A page where you add input fields allowing the visitors to enter the data the website asks of them. This data is then sent to the e-mail addresses listed in the settings.
06 – LATEST NEWS
A page for a structured display of news. For each news item, there are preset fileds for the headline, date, main text and image.
07 - LINK TO ANOTHER WEBSITE
A click on such a menu item redirects the visitor to the address entered in the settings.
08 - NO CONTENT - DISPLAY OF THE FIRST SUBMENU ITEM
Upon clicking on such a menu item, the first menu item on the lower level opens up. - Click on the ADD button.
- Enter the ITEM NAME (this will be shown in the menu).
- Set where the menu item will be positioned in the menu (SUPERIOR LEVEL MENU ITEM).
- Choose a template page. This will set the proportions (size, position) of the individual menu items.
- Click the CONFIRM button. This will create the menu item which can then be edited.
- Once you have edited the contents of the subpage and you wish to display it as part of its menu, tick the appropriate box (VISIBLE).
